How to get started with your own webpage
How to setup a website like this and host using GitHub Pages
By Piers Walter
Overview
In this blogpost we will cover how to get started with your very own webpage, with your own domain name like the site you’re on right now. To do this we will make use of a custom domain name, as well as GitHub pages, and one of the many templates which are available for a personal website.
Hosting: What is GitHub Pages?
GitHub Pages is a service from GitHub which allows us to host static web content easily and for free. There are some pros and cons to using it so let’s cover those to make sure it’s right for what we want to do.
Pros
-
Price: GitHub pages is free to use
-
It’s common: lots of people use GitHub Pages which means there’s support and tutorials for what you’re trying to do
-
Customisation: As we’ll see later in this blog, you can host using a custom domain name very easily
-
GitHub Actions Integration: The close integration of GitHub Actions allows us to work on our site locally, push, and GitHub will build the new version of the site for us
Cons
-
Client-side only: There is no server-side functionality available, so everything must be done from the client’s browser. This means we can’t use things like databases or server-side APIs
-
Visibilty: A GitHub pages site is always publicly available when using free GitHub, even if the repo itself is private. This isn’t really an issue as it’s disabled by default on repositories but don’t host confidential data using GitHub pages
The Template
To start with, we’ll take a copy of this very blog. The source code can be accessed on GitHub, at which point click the Fork button to get a copy of it for your own use. This repo is already set up and has the necessary GitHub Actions included.
Enabling GitHub Actions
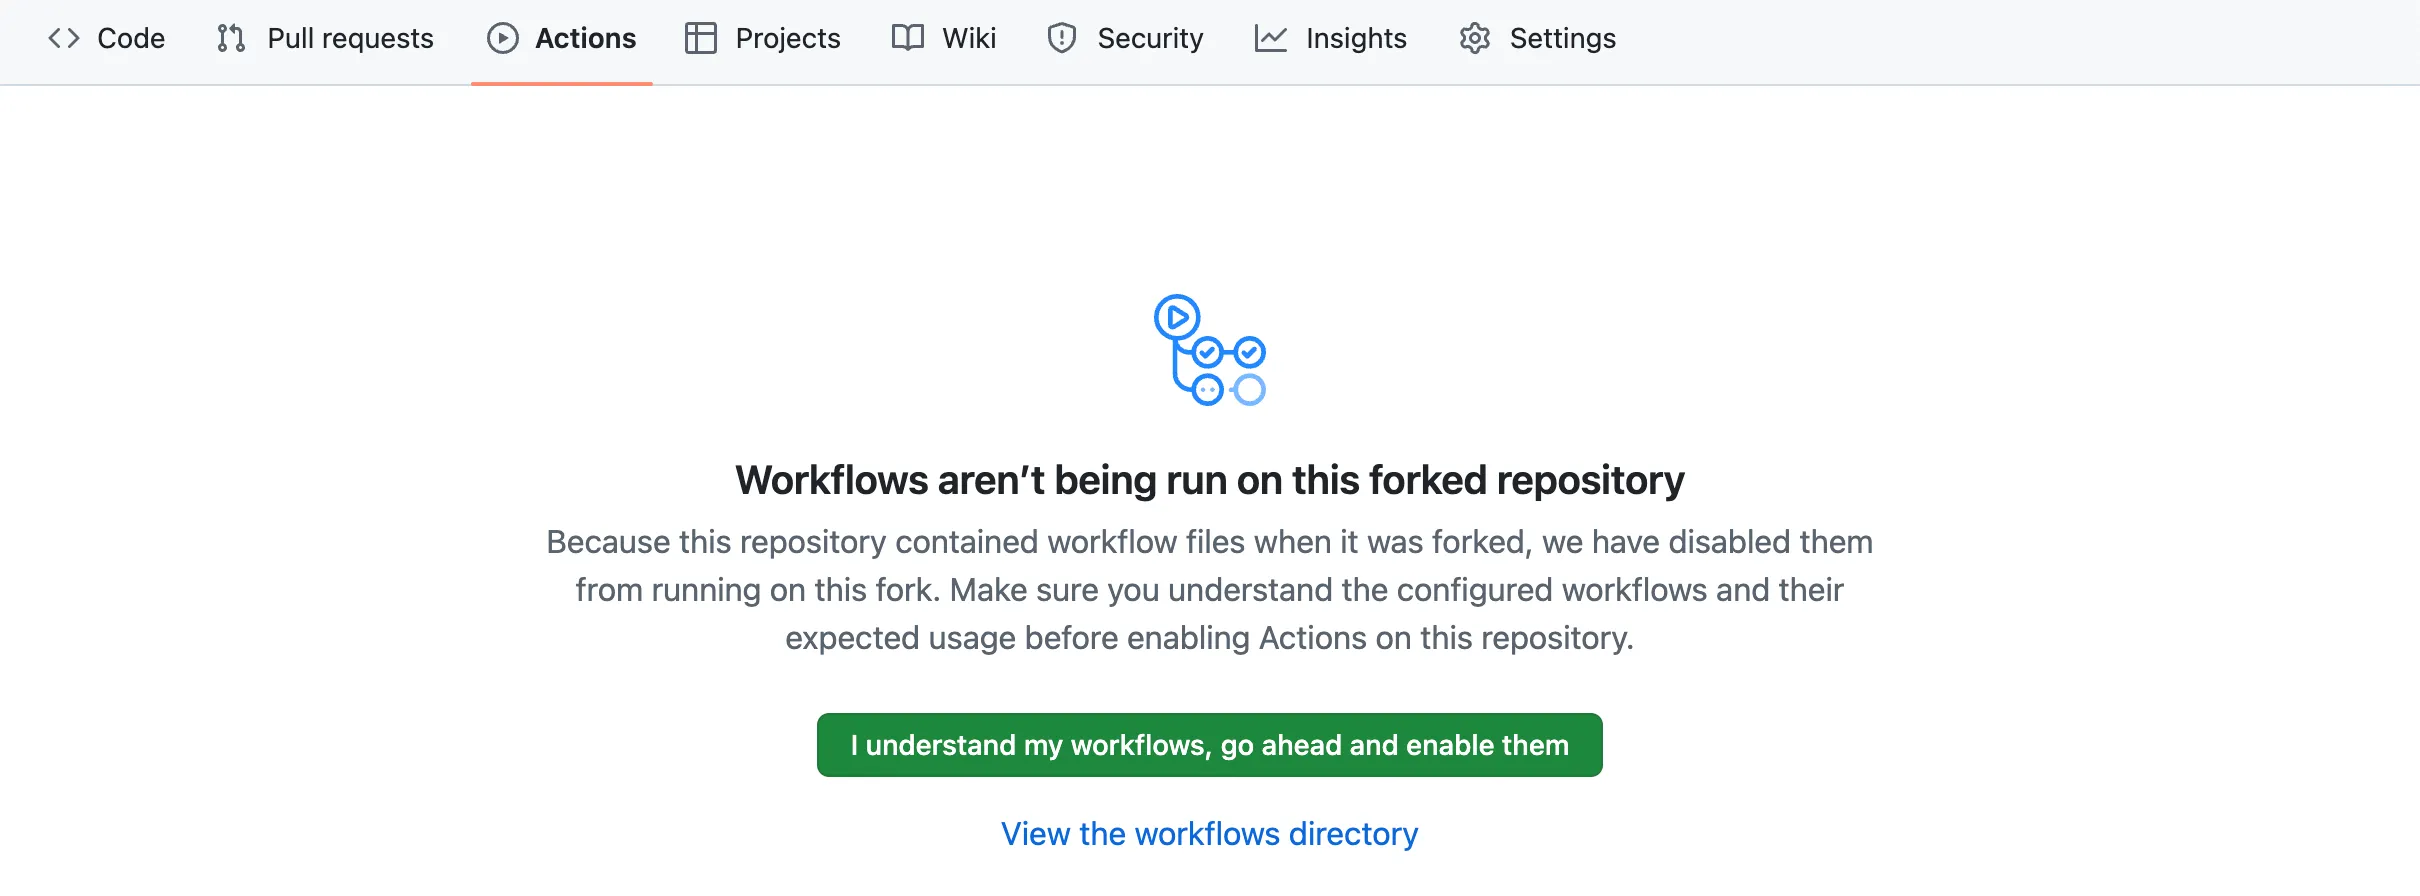
As we have forked the repository, we need to enable GitHub actions. Press the button to enable the workflows from the actions tab

This means that every time we push to our repo, it will automatically build and deploy the latest version of the webpage.
Enabling GitHub Pages
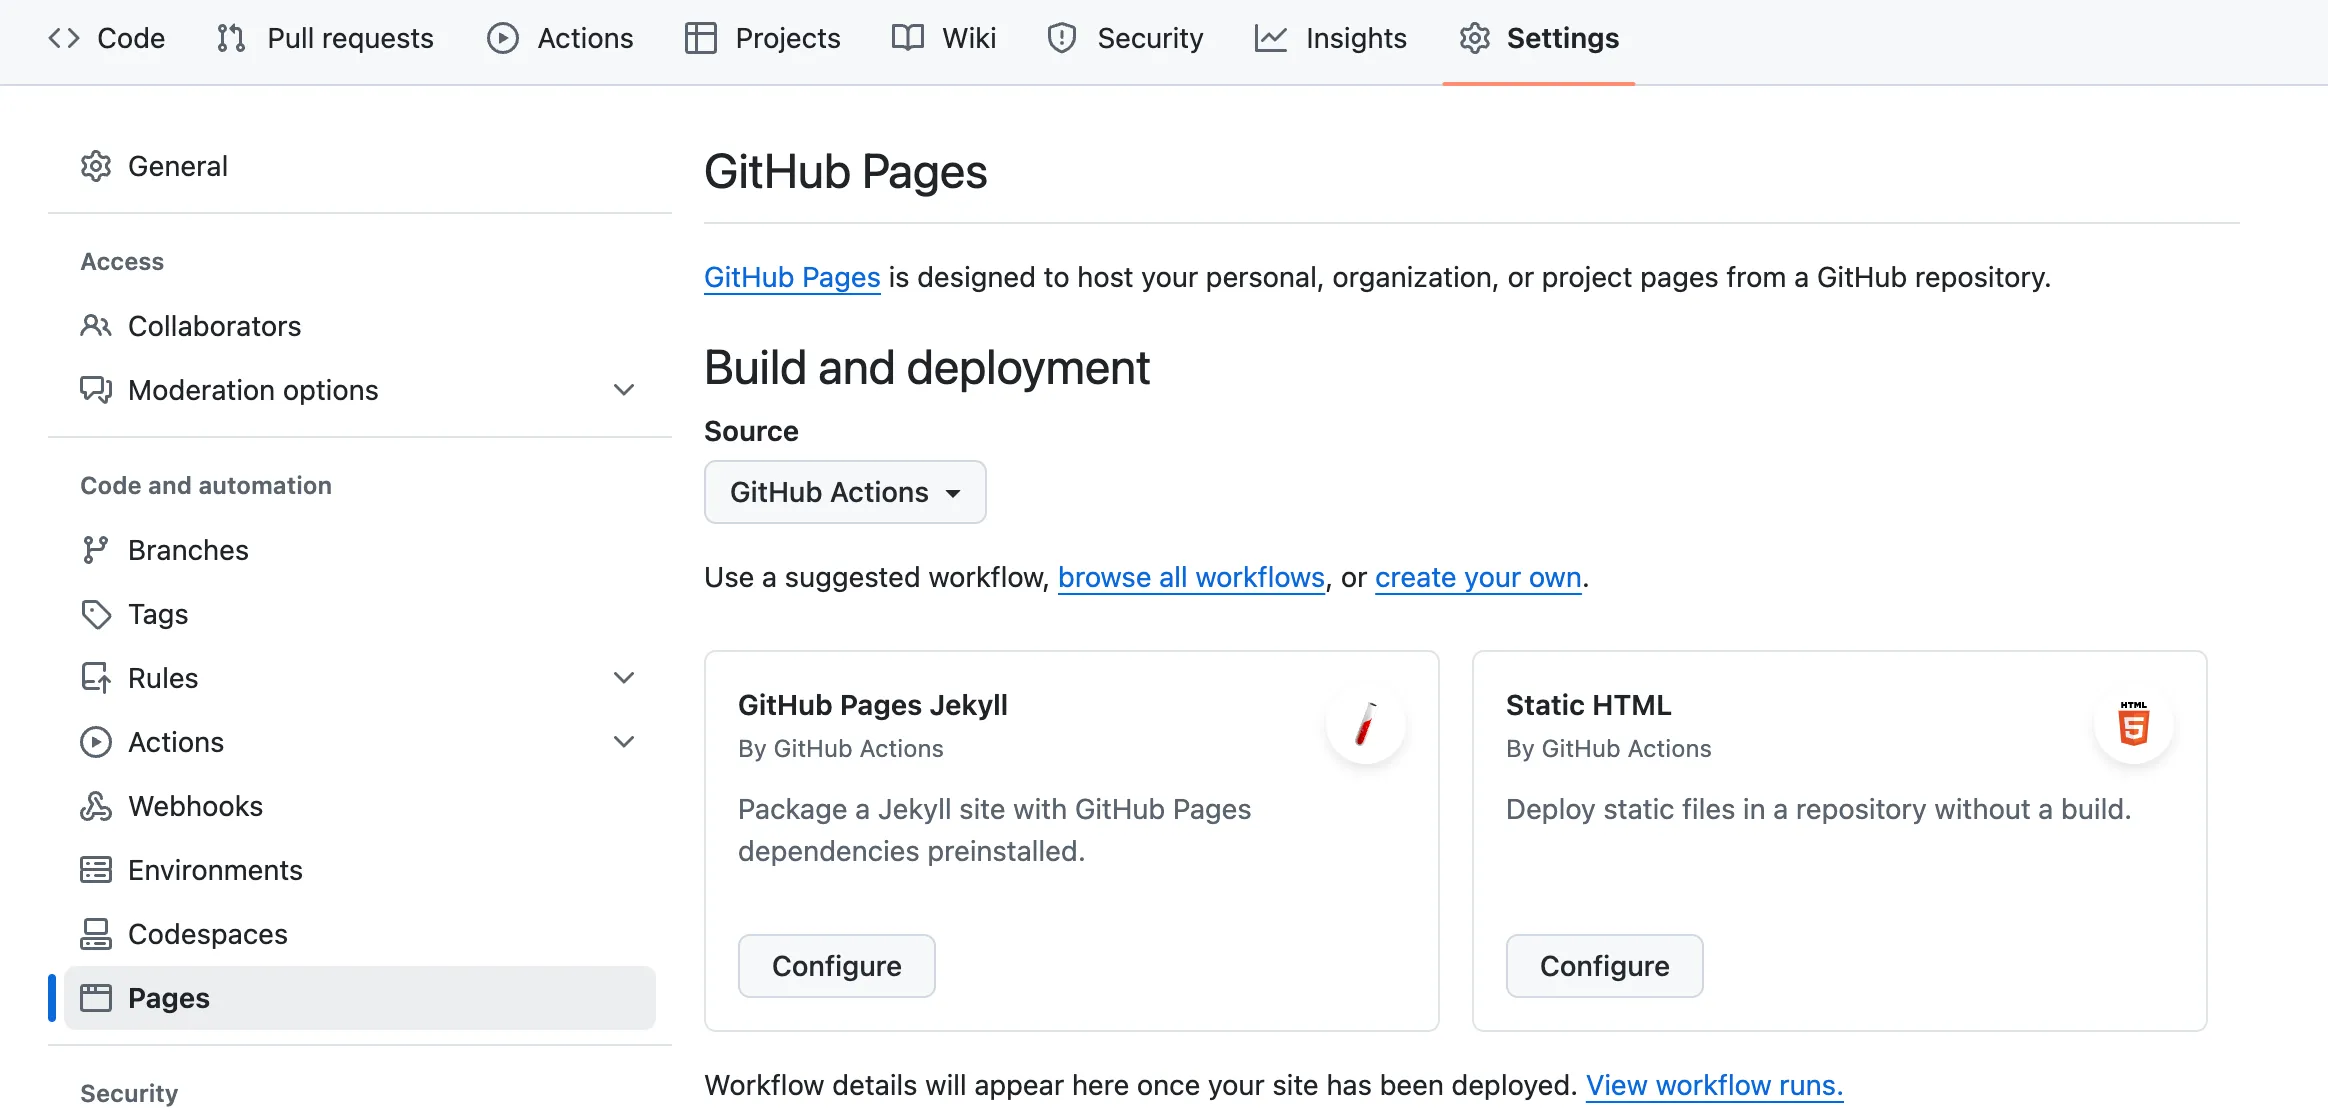
We now need to tell GitHub that we’d like to use pages. To do this, navigate to the repository settings, select Pages from the left and change the Build and deployment source from “Deploy from a branch” to “GitHub Actions”

Deploying Our Site
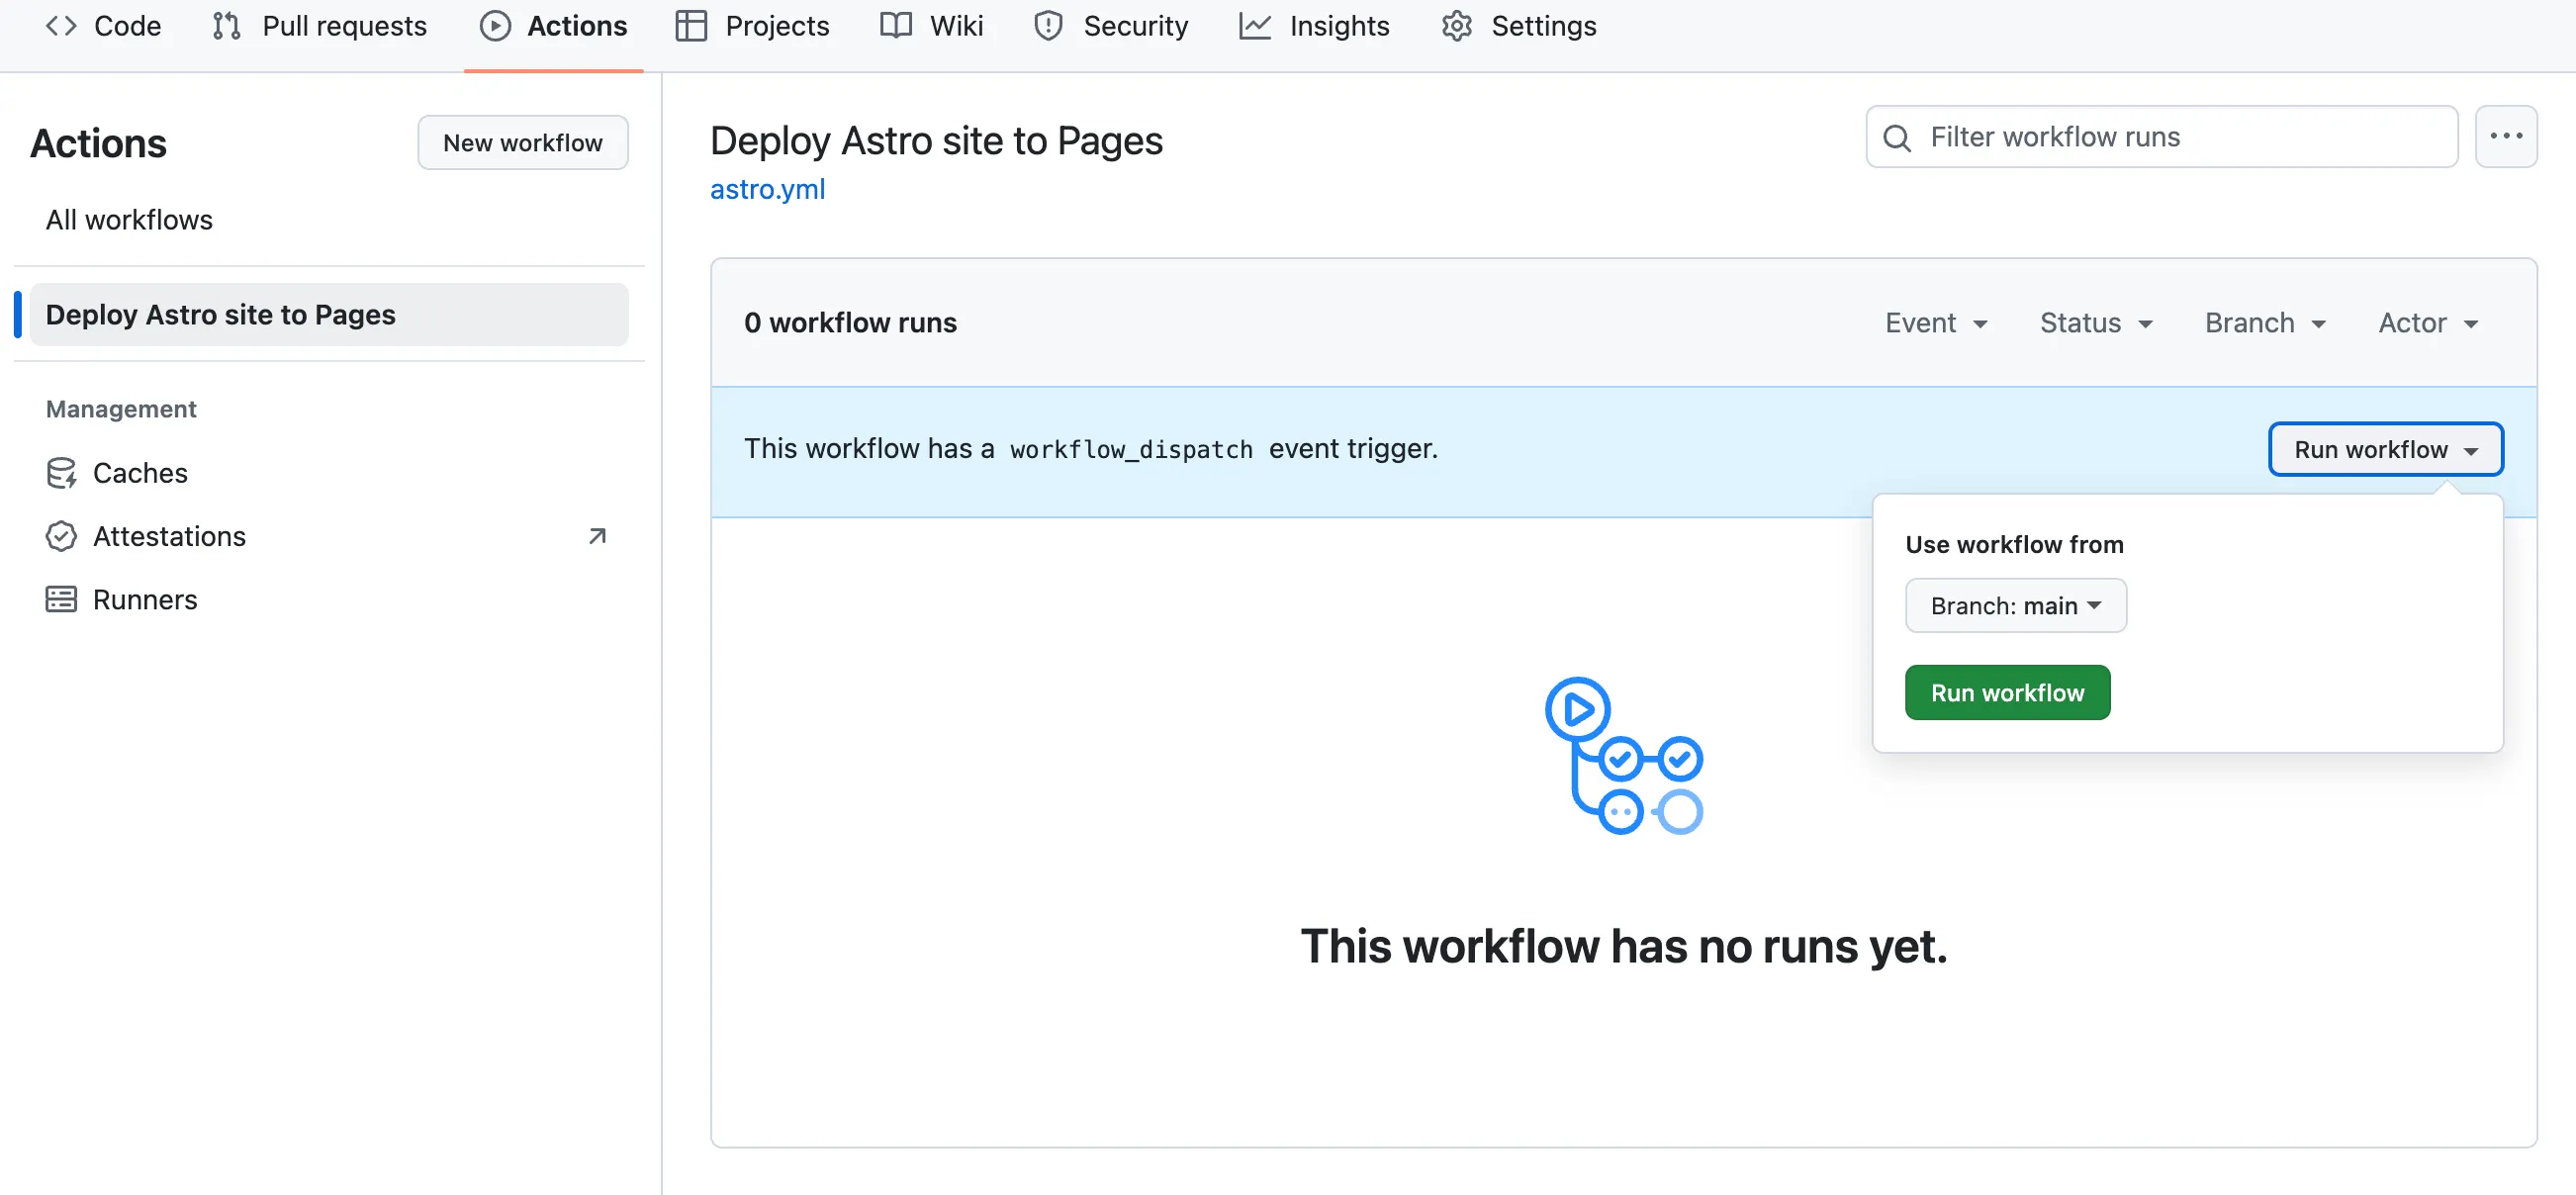
As our repo is now configured correctly, we can run the GitHub action to build and deploy the site. Navigate to the actions tab and select the “Deploy Astro site to Pages” workflow on the left hand side, and then the run workflow button on the right hand side

Once the workflow completes, which should take around a minute, your page will be live on GitHub pages. Go back to the pages section of the repo settings to get your URL and visit your site live.
The Domain Name
We should rename the GitHub repo to your-username.github.io so that your blog URL doesn’t have blog.pierswalter.co.uk included in it. When the repository is named like this, it’s a special case and means that you can use the base your-username.github.io URL on its own.
Now we have our blog or webpage accessible from the your-username.github.io domain, let’s get started with making it
accessible from a custom domain name. Buying your own domain allows you to put any page at custom-domain.com, meaning
that the fact you’re hosting with GitHub pages will be transparent to your visitors.
There are many different providers for domain names, including GoDaddy, NameCheap and 123Reg. Who you order your
domain from isn’t too important for what we’re doing, although they will have slight differences between them for more
advanced functionality. You can go to the provider’s webpage, enter a domain name you’re interested in and receive a
price. Domains which are shorter or have common words in will cost more than longer ones with less common words. E.g.
piers.xyz is currently priced at £6,000 a year, compared to pierswalter.xyz which can be purchased for ~£10 a year.
Domain names are more like subscriptions and you will need to renew it every 1/2/3 years otherwise it will lapse and
someone else could buy it.
Once you have gone through the process of buying the domain name, we need to point it at GitHub pages. To do this,
navigate to your provider’s DNS management page, and create a CNAME record. You can either host your blog on a
subdomain, such as blog.pierswalter.co.uk or on the “root” domain so just pierswalter.co.uk. One thing to note it
www is treated like any other subdomain, and so would need a seperate entry in your DNS records.
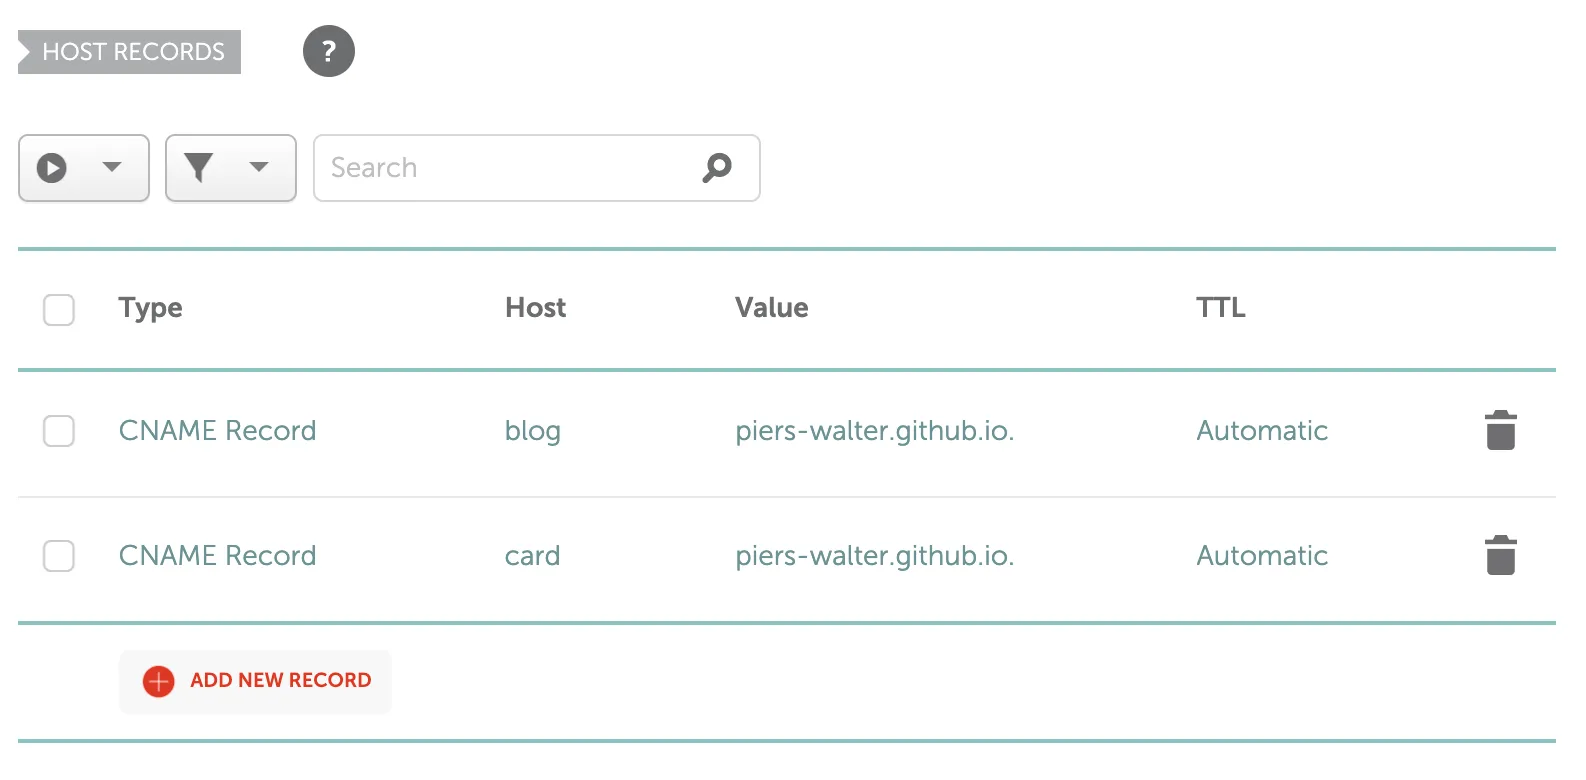
Below are my DNS records for the domain pierswalter.co.uk, which I’m hosting both my blog and a business-card style site on two seperate repos with github pages. Do this but change the value to match your GitHub username

With the DNS set, you can check that the records have successfully reached the DNS servers by running dig blog.pierswalter.co.uk, replacing the URL with yours.
With this done, we can go back to the GitHub Pages settings and enter a custom domain. Make sure to use the full domain, such as blog.pierswalter.co.uk. GitHub will then check that you have this pointing to GitHub and if it does, it’ll generate a certificate for your page, allowing it to be served over HTTPS.
Conclusion
At the end of this, you should have a blog website hosted on your own domain. You can get writing and sharing everything you’re working on. You can use this also as a guide to host any kind of web page using GitHub Pages as a server for your static sites